Call me weird, but wiring is actually one of the tasks that I REALLY tend to enjoy. Maybe it’s because along the way, there are several “accomplishment moments”, when you make a circuit work? It can also be extremely frustrating at times too, which is why I decided to write this post. (technical writing is NOT one of my strong points!)
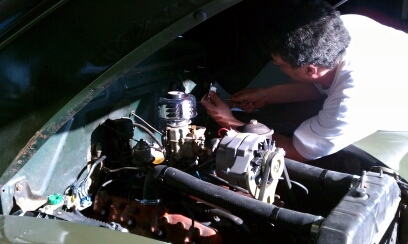
This past weekend, I began the re-wiring of my aunt’s old ’40 Ford stake truck. A little history about it…I would say that she and my uncle bought it about 35 years ago, and it got driven quite a bit for about 5 years or so, then got parked in her storage building, after they divorced. I have been asking her to sell it to me for years, and now that she’s in her mid 80’s, she passed it down to me to be the current “care taker” of the truck. Other than wiring and a little lower set of springs, the truck will remain nearly stock.
I had initially planned on keeping the truck 6v, but when I had a couple of wires nearly fall apart, or at least the insulation on them, I decided that if I was going to re-wire it, I would put modern fuse protection into it and convert it to 12v in the process. I used this page as the “parts list” for my conversion, too There’s tons of threads on the HAMB about this, but I couldn’t find any that dealt with some of the specfic things that I was running into.
For the record…I cannot stand using wiring harnesses that are “pre-wired” or pre-terminated. Since nothing that I have has electric seat motors, heated mirrors, A/C, cruise control, etc, there are always WAY too many wires in the bundle. In addition, I prefer to wire each circuit individually, versus having to do it all at once. I much prefer using the panels that I can terminate back to. I had used an Enos panel in my ’40 coupe, and this time I went a little closer to “local” and bought the “Power Panel II” from Rex, over at Affordable Street Rods, in Kansas. I was able to get it “next day”, due to proximity, using standard UPS shipping!
My goals are to keep the wiring to a minimum, keep it clean and simple and to keep the original on/off column switch, start button and headlight switch(s). Since every wiring diagram that I have ever seen doesn’t deal with the stock switch at the column, nor how to make a grounding 1 wire push button work to start the engine, I decided to share my findings, hopefully alleviate someone else’s future frustration with the same thing, and more importantly, save someone from putting an ugly key switch and late model column into their hot rod!
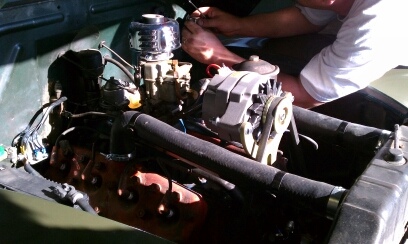
The main focus of this post is to deal with the core wiring that makes the vehicle run, and specifically, the connections to the ignition switch & start button, that causes the magic to happen. Coincidentally, that happens to be at the point where I stopped on Saturday!
A “standard” key type ignition switch has the following “poles” on it: Battery, Ignition, Start(sometimes marked SOL), and Accessory. The stock Ford column has an “on/off” switch and on the back side of it, there are 3 poles. These are marked “Battery”, “Coil” and “Gages”. The Off position cuts power to the “coil” and “gages” poles, so either can be used to pull power from. What’s missing is the “start/SOL”, and since the stock starter button is a “grounding” switch now, like a horn has, it requires a relay to be inserted into the mix.
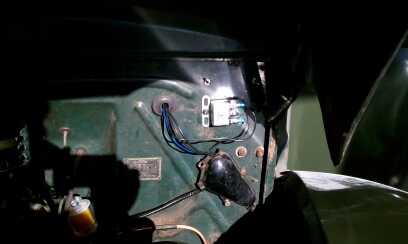
I used a late model Ford 12v starter solenoid. On the Battery side, I ran two 10Ga wires. One goes to the terminal on the back of the GM alternator and the other goes to the “battery feed” to the fuse panel. This powers the panel and the stuff connected to it. (not discussed is the other wires from the alternator. I am not a 1 wire alternator kind of guy)
From the wiring panel, there should be a power feed that goes back out to the ignition “Bat” pole. Connect this one to the BAT pole on the column On/Off switch.
From the S pole, on the solenoid, I ran that over to a 3 prong horn relay, like this one.

This wire goes to the connector that would be used for the “horn”.
The pole that supplies the power to this is connected back to the “coil” pole on the column on/off switch. The “switch” pole would typically go back through a neutral safety switch (a continuity interruption switch when closed) and then to the “start” button. Mine currently does not, due to the fact that I was wasting my time, banging my head against the wall, trying to figure out why there are 2 terminals marked for this and the neutral safety switch that really should just be bypassed and wired directly. Since the truck has a standard tranny, I am going to use an “arm” style brake light switch under the clutch pedal to serve as a neutral safety switch.
That’s about it for this post. If I run across any other things that I feel are worthy of documentation, I will be sure to post them. One thing that I am anxiously awaiting is the parts that I ordered on E-Bay, to make my own 12v to 6v reducers to use on my gauges.
(disclaimer: Bret Chrismer is NOT a wiring genius/electrical engineer, nor does he play one on TV. The opinions and tech tips expressed in this post are the result of banging his head against the wall and several hours of comparing wiring diagrams and reading forums the interwebs. Should you choose to follow any of his hair-brained ideas, you do so at your own risk.)
Bret
bret@streetrodder.net
http://StreetRodder.Net
The FUN is in the RUN!!!
I’m with you on this Bret, doing your own wiring & having to think through the issues is both satisfying & challenging. It also means that if something stops working sometime in the future, you know where to look.
Just received the May 2012 issue of Hemmings Classic Car magazine which features an interesting article re the restoration of a ’41 Ford Pickup Truck.
Great looking ’40. Thanks for the link on your page. Hope all is going well. I can’t wait to see the truck in person at the Mid-America Nats in May. When I get some shirts printed, I will send you one.
Thanks,
Rex